Double-Fold Quilt Binding: A Beginner’s Guide
This post may contain some affiliate links for your convenience (which means if you make a purchase after clicking a link I will earn a small commission which helps keep my blog up and running but it won’t cost you a penny more)! Click here to read my full Disclosure and Privacy Policy..
There are many different ways to make and add binding to a quilt.
My favorite method uses double-fold binding that is attached to the front of the quilt with a sewing machine and secured on the back with the blind stitch.
There are specific tools you can buy to make bias tape binding, but it’s easy to make double-fold quilt binding without any special equipment.
Binding Defined
Binding is a strip of fabric attached to the front and back of a quilt that covers the raw edges
The main job of the binding is to cover and protect the edges of the quilt.

Two Types of Binding
Single-fold binding has one layer of fabric covering the quilt’s raw edges.
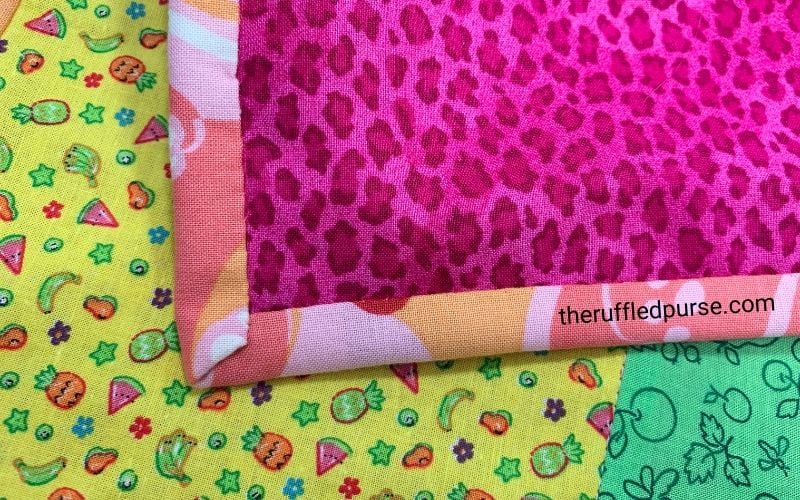
Double-fold binding has two layers of fabric covering the raw edges of the quilt.
Because it consists of two layers, double-fold binding is recommended for quilts that will get a lot of use.
In my opinion, double-fold binding is easier to work with because the fabric strips are folded in half with the raw edges together.
This means you don’t need to press under any long edges like you would with single-fold binding.
Tools and Supplies to Make Double-Fold Binding
While double-fold binding can be purchased, you can make your own.
This allows you to select fabric that will add or enhance the visual appeal of the overall quilt design.
Fabric
The fabric you select should be similar to the weight and quality of the fabric used in the quilt.
The color you choose for the binding is up to you. It can be a solid color or one with a print or geometric design like strips.
Keep in mind that a darker color fabric will define the edge of the quilt better than a lighter color fabric.
Cutting Supplies
As with any project having the right tools for the task at hand makes the process easier.
The best tools for cutting fabric for binding and preparing the quilt top are
Sewing Supplies
A regular sewing machine can be used to sew a binding on a quilt.
It is helpful if you have in your sewing area enough space for some, if not all, of the quilt to rest and not hang off as it is moving through the sewing machine.
You’ll also need a 1/4″ presser foot or another way to make sure the seam allowance is 1/4-inch.
Thread, needles, pins/clips, tape measure, scissors, iron, iron board, and a marking utensil are other supplies you need.
Cutting the Binding
Width of Binding
To determine the width of the binding strips, you need to consider the finished look you’re going for.
Most finished bindings are approximately 1/4-inch wide on the front of the quilt.
On the back of the quilt, the finished binding is either the same width as the front or a little wider.
Most double-fold binding is cut in widths from 2 to 2 1/2 inches.
Here are so some things to consider when deciding on the binding width along with corresponding measurements:
- Cut the binding strips 2 inches wide, because you want the attached binding to be the same width on the front as it is on the back.
- Cut the binding strips 2 1/4 inches wide, because you want the attached binding to be slightly wider on the back than on the front.
- Cut the binding strips 2 1/2 inches wide, because you want the binding to easily pull over the back.
In addition to the size of the binding on the front of the quilt, keep in mind the thickness of the batting you’re using. If it’s very thick, add 1/4-inch to whichever width you decide on to accommodate the batting.
Length of Binding
The total length of the binding will be determined by the perimeter of the quilt top plus a little extra.
To get the total length:
- Measure each side of the quilt and add them up. (the perimeter)
- Add 20 inches to the perimeter. (the extra)
The extra 20 inches will ensure you have enough binding to go around the corners and overlap at the ends where you start and stop. There will be some binding leftover when you are done.
If you don’t have an extra 20 inches of the fabric you want to use, you can add as little as 12 inches to the perimeter for the extra, but don’t go less than that.
Grain Line or Bias Cut
Now that you know how wide the binding is going to be as well as the total length of the binding, you need to decide if you’re going to cut the strips along a grain line or the bias.
Cutting on the bias (a 45-degree angle to the selvages) results in fabric strips that are stretchy. This is extremely helpful if you’re project has curved edges.
Since the edges of most quilts are straight, the binding doesn’t need to be cut on the bias.
It can be cut either lengthwise (parallel to the selvages) or cross-grain (right angles to the selvages).
Cutting on these straight grain lines eliminates any of the stretchiness you would experience when trying to sew a bias cut binding on a quilt top with straight edges. As a result, sewing on the binding is much easier.
Though it may be a little harder to sew bias cut binding on a straight edge because it tends to pull out of shape, it may be worth the extra effort if you want the effect cutting on the bias gives with prints that have a direction. (e.g. Cutting strips on the bias of a fabric that has strips results in diagonal lines on the binding.
Cutting the Strips
You’ve got all the info you need: the width of the binding, the total binding length, and the direction you’re going to cut the fabric.
There are a couple of other things you need to figure out.
How many strips to cut
To determine how many strips to cut, you need to take the total length of the binding and divide it by the length of each strip you cut.
For example, if you need a total of 220 inches (200 inches of quilt perimeter plus 20 extra inches), and each strip you cut is 40 inches long, you’ll need to cut 6 fabric strips.
220 divided by 40 equals 5.5
It is better to have a little too much binding than not enough.
How to cut the ends of each strip
After you cut the strips, you need to make a decision on how you’re going to connect them. This decision will tell you how to cut the ends of the strips.
There are two ways to cut the ends of strips you’re using for binding.
- Leave the ends of the binding strips at a 90-degree angle after cutting off any selvages.
- If you do this, when you sew across the width to connect the binding strips together, it will leave a lump in the binding when you attach it to the quilt top.
- Cut both ends of every binding strip at a 45-degree angle.
- This will eliminate the bulk you get when sewing the ends together as described in #1.
Tips for cutting the ends at a 45-degree angle
Use the lines on a rotary cutting ruler to get an exact 45-degree angle.

The cuts you make on each end of a strip should be parallel to each other.
To get an accurate seam line when sewing the strips together, cut 3/8″ off the point on each strip end.

How to Sew Binding Strips Together
With right sides together, line up the raw edges of the short ends.

Use a 1/4′ seam allowance and sew the strips together until you have one long piece of binding.

Press the seams open.

Finishing the Binding
Fold the binding in half so the raw edges are lined up. Press.

That’s it. You’re done!
Now you have some double-fold binding. Let me show you my favorite way to attach binding.
Let’s Connect
My goal at The Ruffled Purse is to support, empower, and inspire you to sew and make wonderful things for yourself, your home, and others.
Need help or have questions on this project, pattern, or tutorial? Send me an email at nicki@theruffledpurse.com and we can work together to get it figured out!
Make sure you sign up for Snappy Scissors (my FREE newsletter sent directly to your inbox) for ongoing sewing inspiration and education. You can find the sign-up box at the bottom of the post.
Also, like or follow The Ruffled Purse® on Facebook. This is another way to stay up-to-date on the fun things going on at The Ruffled Purse.
You can even follow me on Pinterest, Instagram and YouTube! 😊
As seen in:


Looking for more sewing education? Here are a few other posts you may enjoy:


